


Baroque Playstation Hell Dungeon Guide
The following guide groups the Hell Dungeon into sets of 10 floors. Each set displays stats for the new Grotesques introduced in each section, along with some general strategy.
The easiest way to beat the Hell Dungeon is to simply farm upgrade materials and store them with Thing Thing. Once you have a +99 ATK sword, +99 DEF coat, and some powerful parasites (to prevent ailments and to further boost your stats, such as a +99 Assault Guard Worm), the Hell Dungeon will become incredibly easy to beat.
This guide, however, will be focusing on how to beat the Hell Dungeon from scratch. It's a very punishing challenge that relies on some luck early on, but it is entirely possible.
BF1
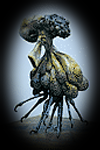
Grotesques: Grue, Moon, Kato
As soon as you enter the single room of BF1, locate the exit and leave immediately. Otherwise the Grue moshpit that welcomes you to the Hell Dungeon will kill you in 2-3 hits. The next floors will have the space necessary to dodge attacks.
Your first mission is to find a weapon and start killing Grues. Learn to walk backward in rhythm with their hops forward. Attack at the apex of their leaps and make sure not to let them run into you. They drop Silver Bones which will make killing other Grues much easier. The streams of fire you blow after gnawing one will allow you to quickly and effortlessly fry their comrades. Save any Burst Bones they drop.
The Burst Bones will be used as the Hell Dungeon begins introducing Moons and Kato. Kato should be your higher priority targets, as they will drop Toy Boxes. However, they also drop Hungry Boxes so always be diligent in what you're picking up and throw any Hungry Boxes away immediately.
By exploiting this loop, you should be ending up with large amounts of Toy Boxes. With these, you can search for the gear you want and also stock up on flesh. Eat any flesh and hearts while at full HP/VT immediately, because you will absolutely need to get your max HP/VT up as fast as possible. Hell Dungeon Grotesques hit really hard, and this will also enable us to eventually heal 999 HP/VT instantly with full heal items like Genius Flesh, Heart Fruit, and Nutritive Fluid.
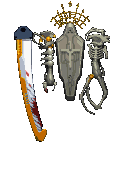
As for your equipment, Wave Swords or Wave Sigils are good for novice Hell Dungeon spelunkers. These will allow you to engage Grotesques from a distance while slowly moving backward. It's a great strategy for cheesing powerful enemies early on.

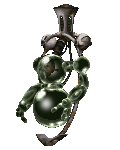
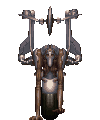
Moon
Weakness: N/A
Drops: Evacuation Bone, Experience Bone

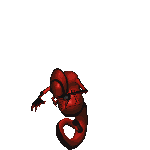
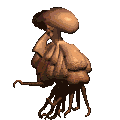
Grue
Weakness: N/A
Drops: Silver Bone, Burst Bone
Kato
Weakness: N/A
Drops: Hungry Box, Toy Box
BF10
Grotesques: Grue, Kato, Gliro, Bulger
The Hell Dungeon will now start to introduce Bulgers and Gliros into the mix. In my experience, Bulgers have a fairly low drop rate and the Average Flesh they tend to drop doesn't really compare with the stream of flesh from all of the Kato Toy Boxes you should be opening. It's always important to make sure you're getting a decent amount of EXP, but you should still be relying primarily on items and those are better spent on Grues and Kato (as they will be leaving the spawn pool by the next section).
Gliros, on the other hand, should be avoided at all costs. As if stealing your items wasn't bad enough, these blue Gliros can kill you in a couple of hits and have nearly four hundred HP. The AD fluid they drop is invaluable, but they'll be sticking around for most of the Hell Dungeon and you're just not ready for them yet. Trying to kill them at this point is both a huge risk and waste of items. The next section will introduce a much better source of AD Fluid.
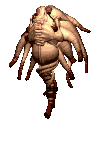
Gliro
Weakness: N/A
Drops: Stolen Item, AD Fluid
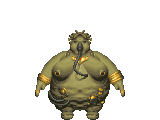
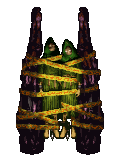
Bulger
Weakness: Fire
Drops: Average Flesh, AD Fluid
BF20
Grotesques: Gliro, Seventeen, Soconpo
And now the Hell Dungeon will reward you if you've been playing it safe and avoiding the Gliros. Seventeen is the single best source of upgrade materials in the entire Hell Dungeon. They have (relatively) low HP, are incredibly safe to circle-strafe, and only pose a threat through the Suicide Bomb Patterns they sometimes drop. These mobs will allow you to quickly build up your gear, and once you're at around +40-50 ATK/DEF, you can finally start going after Gliros. If you got an Immobility Brand or Adhesive Brands from your Toy Boxes, then Gliros should pose very little threat at this point. And that means even more AD Fluid, enough to quickly see you to +99/+99 equipment.
If you're taking what feels like an unsustainable amount of damage, back off from Gliro fights and just go after Seventeen some more until you're more powerful. Meanwhile, avoid the new Soconpo mobs unless you're desperate for EXP. They're a waste of time and the Parasitic Boxes they drop can ruin your entire run very quickly if left unchecked.
Seventeen
Weakness: Behind
Drops: Suicide Bomb Pattern, AD Fluid
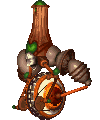
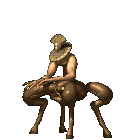
Soconpo
Weakness: Ice
Drops: Don't Have Box, Parasitic Box
BF30
Grotesques: Gliro, Jerryrom, Death
At this point you should definitely be strong enough to be killing Gliros, so with the disappearance of Seventeen, they should become your top priority until you've maxed out your gear. Remember that you can back away while strafing as they start the stealing animation in order to cancel their attack. Jerryroms drop dangerous items and give very little EXP, so don't bother. If they're in your way, bait them into self-destructing (near other Grotesques if possible) and run for cover. And on the subject of running away, avoid Death at all costs. They deal insane damage and their drops aren't remotely worth it.

Jerryrom
Weakness: N/A
Drops: Explosive Pattern, Vanishing Pattern
Death
Weakness: Lightning
Drops: Revolution Fluid, Evolution Fluid
BF40
Grotesques: Gliro, Jerryrom, Orhuganous
There isn't much new to see on these levels. The Dispersion Patterns dropped by Orhuganous can absolutely wreck you if they catch you offguard or if you're carrying lots of bones, so be careful. Considering how much more health they have than Gliros, the minuscule EXP you get back from them is hardly worth it anyway. Gliro's massive 777 EXP drop is still your best bet for leveling up by a wide margin.

Orhuganous
Weakness: N/A
Drops: Dispersion Pattern, Revolution Fluid
BF50
Grotesques: Sin-Moniz, Orhuganous, Niculi and Nicula
Gliro will be taking a backseat for awhile, but your new best friend in the Hell Dungeon is just about to show up. You should now have maxed out gear and some considerable stats, so now Sin-Moniz will be ushering in the next phase of your plan: bone hoarding. They're entirely incapable of damaging your HP, so farm them for all the Invincibility and Rotten Bones you can get your hands on.
Rotten Bones are invaluable for instantly ending fights, and if you have a Stomachache Worm, you can quickly boost your HP to 999. The Invincibility Bones are also helpful, but it will be better to save those for the endgame.
The items dropped by Niculi and Nicula are virtually worthless and they'll tear through your HP at terrifying speeds. Consider using the occasional Invincibility Bone to slip past them unscathed.
Sin-Moniz
Weakness: Lightning, Ice
Drops: Invincibility Bone, Rotten Bone
Niculi and Nicula
Weakness: N/A
Drops: Anonymous Torturer, Recovery Torturer
BF60
Grotesques: Gliro, Aries, Cocteauhead
Gliros will start making their return in the coming floors, but your new target should be Aries. They're very easy to dodge or circle-strafe, and the Girder Fluid they drop is a key step in maxing out the amount of bones you're carrying.
Cocteauhead's Hell Dungeon variant, meanwhile, is the complete opposite. They have a lot of health, irritating and time-consuming attack patterns that will waste your VT, and don't drop anything remotely useful. Avoid.
Aries
Weakness: N/A
Drops: Waste Water, Girder Fluid
Cocteauhead
Weakness: N/A
Drops: Arching Torturer, Explosive Sigil
BF70
Grotesques: Aries, Cocteauhead, Magician
This is the last section of floors before the difficulty takes a massive jump. Your focus should be on killing Magicians for their Walking Bones, and then killing more Aries for Girder Fluid you can use to multiply your Walking and Invincibility Bones. Having 30-40 of both of these bones should be more than enough to speed through the rest of the Hell Dungeon once you feel that the difficulty has become unsustainable for you. If the Magician mobs get out of control (and they will), gnaw the Gold Bones they drop to deal massive amounts of AOE damage. Don't be afraid to just grab whatever Walking Bones you can and run. Hell Dungeon Magicians multiply much faster than their base-game counterparts.
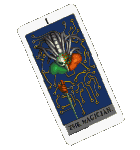
Magician
Weakness: Fire
Drops: Walking Bone, Gold Bone
BF80
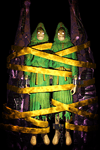
Grotesques: Magician, Johanna Kyon, Festum
This is it. If you haven't already, start using the Walking and Invincibility Bones as soon as Festum shows up. Johanna Kyon's confusion ability can leave you floundering in potentially lethal situations, but Hell Dungeon Festum is the single most brutal Grotesque in the entire game.
Even at level 99 with a +99DEF coat and +99 Guard Worm, these red Festums can kill you in only a few hits. Even if you do kill one, they only drop patterns designed to destroy your inventory and ruin your run.
Hell Dungeon Festum is the reason we've been hoarding Invincibility and Walking Bones. Make yourself invulnerable and then gnaw Walking Bones until you arrive at the floor's exit. Repeat this process on every floor and the rest of the Hell Dungeon will be a cakewalk.
Johanna Kyon
Weakness: N/A
Drops: Death Bone, Arrow Bone
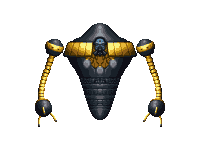
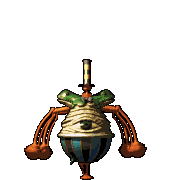
Festum
Weakness: Lightning
Drops: Vanishing Pattern, Food Pattern
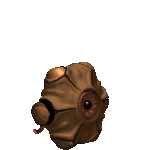
BF90
Grotesques: Johanna Kyon, Festum, Hananip
You shouldn't have any problems with this final stretch if you've been preparing and haven't run into any Dispersion Patterns. But if you're running low on bones, Hananip also drops Girder Fluid to get you stocked back up. Just keep up your invincibility until you're able to warp to BF99's exit.
Hananip
Weakness: N/A
Drops: Girder Fluid, Homing Bone
BF100
And that's it. Once you've reached BF100, you've completed the Hell Dungeon. Only an empty room with an exit Sense Sphere awaits. Walk to the center of the room and teleport back to the Outer World.
Talk to Coffin Man and he'll reward you with three items that you haven't registered on your Item List yet. If you brought rare items out of the Hell Dungeon in order to fill out your Item List, be sure to register them with Thing Thing before talking to the Coffin Man.