

Baroque Syndrome
The visual novel, "Baroque Syndrome", is not something I will be translating in full and hosting on the site. Such a project would be extremely cumbersome, repetitive, and possibly in violation of Neocities' copyright policies. However, I have translated enough in order to write up a detailed summary of every route within the game for those curious about the plot.
It is necessary that you have read the original Baroquism Syndrome and Interludium stories, due to heavy spoilers and the repeated references to them contained within this article.
Introductory Segment
The game removes the two chapter prologue featuring Yumi Anzai and instead cuts straight to Fumi entering the Baroque shop and giving Kitsune the Tarantella disc. On the way to Suzume's place, Kitsune runs into two high school girls - one of which is Ruby. They are discussing District Zero, until they see Kitsune eavesdropping and start accusing him of being a pervert. Because his "reputation would never recover" if he was labeled a pervert (despite Kitsune being a crook who exploits the mentally ill), he runs off when he hears another high school girl scream in the distance.
You can either run towards the scream or to Suzume's place. If you go to Suzume's, the plot identically follows the "Sense Sphere" chapter of volume 1, ending with Suzume being hospitalized after listening to the disc. If you go towards the scream however, you discover Rie (from Interludium's "Escape"). She's being pursued by 'someone', and collapses from a cut on her leg. Kitsune then gets a call from Suzume. Ignoring the unconscious girl, Kitsune listens to Suzume tell him over the phone that he found some secret data (which conveniently turns out to be the Tarantella melody). Suzume listens to it while on the phone with you, passes out, and you call an ambulance for both him and Rie. You can also go to Suzume's place instead of checking on Rie, make him angry by refusing to see the "Perception" data he discovered, get kicked out, encounter Rie, and then get a phone call from Suzume - who apologizes and proceeds to listen to the Tarantella data over the phone and collapse as if you'd never gone to his house at all.
Ruby Route
If you ignored Rie, you're now on the Ruby route. The Ruby route is virtually identical to the rest of the original Baroquism Syndrome stories until the start of Volume 3: Kitsune returns to his office, finds Ruby there, and they go to District Zero together where they are attacked by the mantis egg Grotesque (now a Liar) and the blood bubble baby before being saved by Task. Things derail when, at the start of Volume 3, Ruby offers to teach Kitsune to shoot in exchange for some cake and he cheats her by giving her the disappointing fruitcake as her payment. The plot then skips to Interludium's finale - the Immortal chapter - with the client carrying the dead spider who issues her challenge to Kitsune. Ruby fails the challenge and is bitten by the spider, and after Kitsune successfully solves the riddle, Ruby returns to life and reveals that she "can't die from the Tarantella's poison." Instead of the story ending there, it jumps back to Volume 3, with Fumi re-entering the shop during the earthquake and inviting Kitsune to the Nerve Tower in order to save Suzume (who has been abducted by the Malkuth).
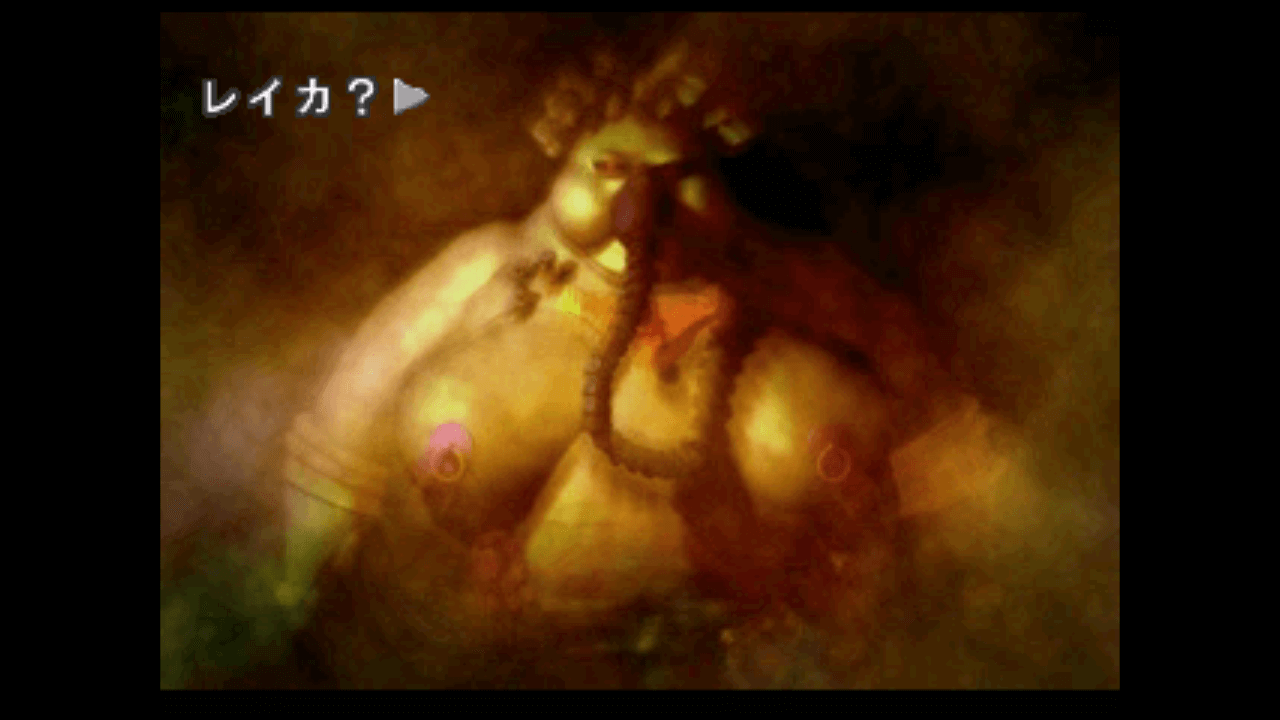
The game proceeds identically throughout Volume 3, with the exception of "Reika" being a Bulger instead of the gigantic Soconpo thing from the source material. Additionally, the hostile angel that shoots Ruby has been replaced with the Archangel. Kitsune escapes exactly the same way and plays the disc, causing the Tower to flood. Kitsune saves Suzume on his way out of the Tower this time, before getting overtaken by the water and going Baroque as he does in the original. The Koriel member saves Kitsune and delivers him to Task. The story ends identically, with Kitsune's email to the Koriel/protagonist of Baroque.
Rie/Ami/Reika Hub Segment (Hospital)
If you met Rie earlier on the way to Suzume's, the story branches off. There are three other routes (Rie, Ami, and Reika) that all share a common starting point which occurs when you arrive at the hospital. Rie tells Kitsune about the rumors of Grotesques, and claims her friend was attacked in District Zero by one. Rie leaves the hospital, and Kitsune discovers that his Tarantella disc is missing. In the hospital lobby, Kitsune sees Ami Tayura (the same psychic celebrity from Interludium) arguing with her manager. Talking to her here will branch you off into the common branch shared by Ami and Reika. Ignoring her means you remain on Rie's route.
Rie Route
Kitsune leaves the hospital instead of talking with Ami, only to discover Ruby in his office just like in Volume 2 of the original story. When Ruby and Kitsune go to District Zero, they discover Rie there, who still claims that she's being pursued. Ruby and Kitsune send Rie home in a taxi, before returning to the Baroque Shop. The next day, Rie arrives at the shop and delivers two keys. From here on out, events unfold identically to the "Escape" chapter of Interludium. When Kitsune rescues Ruby from Rie's house, they discover the corpses of Rie's parents in the fridge. Ruby says she remembers meeting Rie at a place called Kether Pharmaceutical when they were both children. Deciding to investigate further in order to track down Rie, the two head back to District Zero to investigate the remains of the old Kether Pharmaceutical headquarters located there.
While exploring the abandoned building, Kitsune finds documents on Perception, the Sense Sphere detection program, in a room labeled "Tachibana". Ruby finds Kitsune's missing Tarantella disc. They hear a loud noise downstairs, and while pursuing an unknown person through the building, they discover a secret basement entrance in the previously locked library. There they meet Task Takada, who is there searching for a "Grotesque Den" . Task shares a cryptic note he found earlier, stating "The Tarantella is the spider's thread. The girls are manipulated, made to dance. If you follow the thread, you will reach God's eternal country."
Ignoring Task's advice to leave, Kitsune and Ruby follow Task into the cellar where they discover an underground factory. Task's Special Hunters are attacked by Grotesques, including one resembling a two-headed lion. Ruby is convinced this might be the Grotesque that killed Meg, so she starts stabbing it repeatedly. The Archangel arrives to taunt them for no particularly good reason. He implies Rie has already become a 'test subject' and leaves. Ruby finds a pendant on the ground that had once belonged to Rie. Suzume appears and says something about Grotesques being "born from the desires of people" and how it disgusts him. Task arrives on the scene and Suzume flees. Task refuses to inform them of the Archangel's identity, as it would violate the non-interference pact the government has signed with the Malkuth.
Descending further underground, the group follows feathers left behind by the imitation angel wings. The tunnel begins filling with water, and they escape through a route that leads them into the Nerve Tower itself. Suzume is here, and explains that his motivation is linked to the unforgivable sins his father committed. They discover Ruby has mysteriously died during their conversation.
Kitsune and Suzume enter a lab containing an anesthetized Rie. Suzume's father - Dr. Tachibana - enters, and the two get into an argument. Suzume's mother was taken away by his father and used as a subject for his experiments. A Sense Sphere was implanted into her brain as part of the "Perception" program. Suzume goes to shoot his father, and the Archangel intervenes. He spews exposition about how Dr. Tachibana accidentally created Grotesques in an attempt to cure patients afflicted with Sense Spheres by using gene therapy. Although this was seen as a failure by many, the Archangel encouraged him to continue along these lines. Moved by his son's words, Dr. Tachibana refuses to continue with the Archangel's experiments, so the Archangel pistol whips him. Suzume tackles the Archangel, and Kitsune runs away to play the disc containing the Melody.
The Nerve Tower floods and Kitsune runs for it, assuming Suzume will do the same if he so wishes. Kitsune grabs Rie and hauls her to safety. The delirious Rie apologizes to her parents before passing out again. Kitsune wonders if Dr. Tachibana and Suzume will ever reconcile their differences. Kitsune goes Baroque and is swept under by the waves.
Kitsune miraculously survives as per normal, and returns to his job at the Baroque Shop - now accompanied by Rie who has taken over Ruby's role in the plot. Kitsune has lost his memories of the Nerve Tower. Rie shows him a cute new backpack she got, which is decorated with small angel wings. Rie has been "chosen" and apparently exhibits the same precognitive talents that "Ami Tayura has on the TV". Rie begins to pray, claiming she can see a door of light, behind which are visions of the future.
Ami Route
While speaking with Ami at the hospital, she reveals she can see the future behind visions of glowing doors of light and predicts that Kitsune will go to District Zero in order to search for Grotesques. Ami smells of jasmine, and claims that it's the only kind of perfume she can stand to wear. She warns Kitsune against going to District Zero as it will "only cause problems for you and your loved ones." Before Kitsune can press her on how she knows all this, Ami rushes off to stalk a girl that's just been brought in. Ami encourages Kitsune to peep into an examination room, where he sees Ruby and her unusual back wounds. Ami's manager comes to take her away, and Kitsune heads back to the office in a cab.
Against all odds, Ruby jumps in the cab with Kitsune and insists on accompanying him to District Zero - claiming to know Kitsune's true identity as a Baroque Salesman. Blackmailing him with this info, she tells Kitsune that she has to go to District Zero in order to deliver flowers to the site of her friend's death (Meg).
The plot is identical to Volume 2 from here, with the two Grotesque encounters and Task saving their lives. While in the company of the Special Hunters, they discover Ami in District Zero, completely Baroque. Ami is taken away by the Special Hunters, while Kitsune sends Ruby home in a cab. Before Volume 3 can begin, the plot segways into the "Precognition" chapter of Interludium. The events unfold exactly the same way, until Ruby begins informing Kitsune of who Ami is (a celebrity psychic). She continues to elaborate that Ami has a twin sister named Asaki, and wonders if the girl who just entered the shop was Asaki and not Ami. They decide to head to the TV station in order to investigate.
At the TV station, Ruby makes the nonsensical conclusion that Ami and Asaki aren't just swapping places with each other, they're literally the same person. While Ami is performing a psychic reading on a talk show, she begins screaming about how she "can't see anything beyond the door" and flees from the stage. Heading to Ami's dressing room, Kitsune and Ruby find a parcel containing a dead songbird and a note identifying it as "the weight on Maat's scale" (just like in the original story). They steal a nearby video cassette, and realize that they need to go to Suzume's place in order to play it (as it's not in standard VCR format).
Just as in Volume 3, Suzume's place has been torn apart and Suzume is missing. They play their stolen tape, which contains a recording of Asaki performing her sister's psychic routine. The tape cuts to a laboratory, with a Dr. Tachibana giving a scientific analysis of Asaki's abilities. In the background of the footage, they spot Suzume in a lab coat. The lab coats carry the logo for Kether Pharmaceuticals. While investigating Suzume's apartment, they discover the hacked perception data that Suzume leaves behind for Kitsune in the original story. In this version however, the data also includes information detailing how Asaki assumed Ami's place as a famous psychic after her death. The file ends with Suzume's warning to 'beware the Malkuth'. Kitsune also finds Suzume's reproduction of the Tarantella disc.
Asaki calls Kitsune and tells him that she's going to break 'the Melody's Curse', and implies that she's waiting in District Zero. The pair head there, where they hear a scream. They follow it to find a Grotesque (the Lovers, Niculi and Nicula) which kills Ami.
The route ends here, and you have to replay the entire route all over again to gain the option necessary to continue. Regardless of your new options, the Lovers kill Ami again. Ruby gets hysterical and Kitsune slaps her like they're in a 1950's horror flick. They're about to be killed by the Grotesque when it suddenly disappears in a burst of white feathers. They recognize the feathers as being identical to the ones left in Suzume's room. Unexpectedly, they see none other than Ami on their way out of District Zero, wearing angel wings. She disappears into the darkness, and the pair wonder if that was Asaki, or if something else is going on. They recall that Ami had initially been at the hospital, and decide to investigate there for further clues.
They locate the office of the neurosurgeon responsible for Suzume and Ami's care. They find MRI scans for Ami that show the presence of a large brain tumor. The doctor's notes detail that it is this brain tumor that is responsible for her precognitive abilities. It turns out that these charts are Asaki's, not Ami's - and that she died from the tumor on April 27th, 19XX.
While watching TV at the Baroque Shop, Ruby and Kitsune see Ami commentating on the various natural disasters occurring around the globe. They hurry to the TV station to intercept her, only to find her boarding a taxi to the bridge leading to the Special Area. Following her there, Ruby and Kitsune encounter a gathering of Malkuth adherents led by the Archangel. He proclaims that Ami is speaking the words of God. He claims to be "healing God's loneliness", and orders the adherents to begin Kitsune's trial. Kitsune is promptly knocked out.
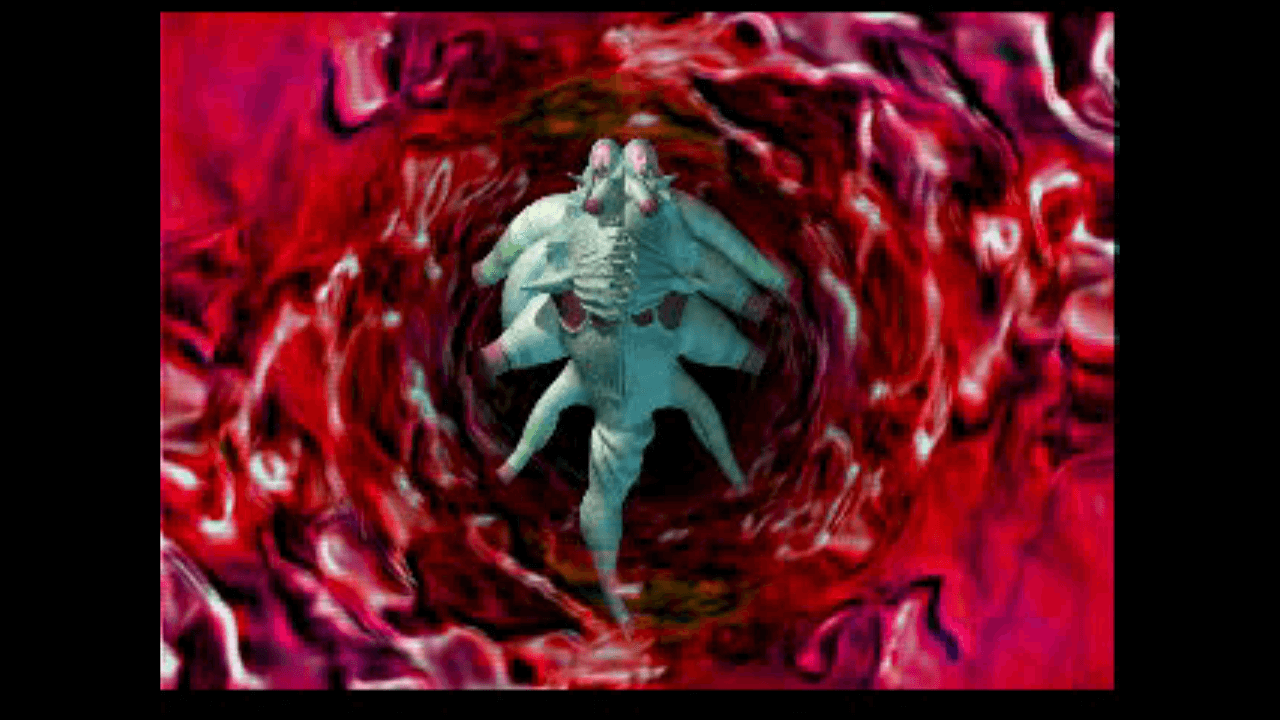
When he awakes, Kitsune is in a room with the elderly Dr. Tachibana, who claims to "have sold his soul to the devil". They're inside the Nerve Tower, and the man reveals that he is Ami's 'father', but not in a legal or biological sense. When he first met Asaki, she was suffering from a brain tumor caused by contact with a Sense Sphere. It granted her precognitive powers, but ultimately killed her. The Malkuth contacted him and enlisted him in an effort to create clones of Asaki in order to "back up" her perception abilities. This endeavor ultimately came to be known as the "Perception" program. Kitsune is removed and thrown into a chamber with Ruby. The Archangel and Suzume are there, and they show Kitsune the ultimate result of the "Perception" program. It's a massive sphere with hundreds of tentacles emerging from it that feeds off of the countless Ami/Asaki clones.
Kitsune escapes from a standoff with the Archangel when he plays the Tarantella disc. The clones break free from their collective trance and all attack the Archangel, before they keel over and die due to the Melody. The Archangel succumbs to the Melody as well, clutching his head and going "uuuu". Kitsune discovers that Ruby is dead, her body already cold, and wonders if her death was also caused by the Melody. The Tower floods, and Kitsune is overwhelmed by sadness that he couldn't do anything for all the dead girls. He then smells a faint scent of jasmine, before being overtaken by the water.
He survives, and returns to his job at the Baroque Shop. He hasn't been able to get in touch with Suzume since that day, but is sure that he will return soon. The Malkuth presence in the city is still ramping up, and "Ami" still appears on TV regularly. Kitsune burns jasmine incense, and speculates that he too will go Baroque soon.
Reika Route
When you have the option to try and save Ami from the Lovers, choose just to watch and see what happens. Before Niculi and Nicula can kill Ami, the Archangel appears. He tells Ami that her temporarily lost powers of precognition will return in time before taking her away. The plot proceeds much the same way as the Ami route from here, until Kitsune and Ruby arrive at the Malkuth initiation rally and are attacked by Reika the Grotesque. The Koriel Leader shows up and saves Kitsune from the other adherents, taking him into the Nerve Tower. He explains that the Koriel oppose the Archangel, and fills Kitsune in on the details of the Perception system. The cloning by itself was not enough to reproduce Asaki's precognitive abilities, and so Sense Spheres were inserted into the brains of the clones as well. Using genetic engineering, they were able to somewhat slow the lethal effects of the Sense Sphere on the brain - but in so doing, they created the first Grotesques. The Koriel Leader reveals that one of the initial test subjects was his lover, Reika - the same Grotesque that was witnessed earlier at Kitsune's initiation. He begs Kitsune to help him in releasing the clones from the Perception system, as Kitsune "is not afflicted by the Melody". Apparently only one such unaffected person can enter the Nerve Tower and release the Melody within its bowels.
Kitsune enters the clone chamber, where he discovers the Archangel, the Koriel Leader, and Ruby. The Koriel Leader implies the entire rebellion started because of his inability to live without Reika. Apparently the Archangel manipulated her into participating in the experiment with promises of promotion within the ranks of the Malkuth. All the subjects, except for Asaki, did not "show affinity" for the Sense Spheres, and were deemed failures - many of them becoming Grotesques like Reika. The Koriel Leader is shot to death by the Archangel. Kitsune damages the Archangel's wings by throwing his gun at them, and uses the distraction to escape with Ruby.
Ruby and Kitsune play the Melody in another room, and the Tower begins to flood. As the Melody plays, Kitsune discovers that Ruby is already dead. On his way out of the Tower, Kitsune encounters Suzume, who refuses to evacuate. Suzume claims he has a mission to carry out "as a member of the Koriel." He promises to contact Kitsune one day, before Kitsune goes Baroque from the Melody and gets caught in the water.
Just like in all the other endings, the Baroque Kitsune goes back to working at the Shop as he watches the Malkuth gain more and more power. Suzume occasionally messages him with new information he managed to uncover, but it seems that he's being monitored by the Malkuth. Suzume tells Kitsune that he's sure Ami is still alive somewhere. The end.
Translator Complaints:
- The method by which Grotesques are created in this game is in direct conflict with nearly every other provided explanation, including Yonemitsu's Baroque prologue in "Baroque Report Z". Instead of an insane God remodeling people based on the Archangel's tarot template, these Grotesques are subjects created by genetic tampering gone awry (one of the side effects includes people transforming into creatures based on their own delusions). For instance, the lion Grotesque is probably a mutated Rie, likely the original who received the 'twin lions' Baroque from Kitsune, while the Rie in the rest of the story is a clone.
- There are plenty of other problems that this game presents. If Asaki died in the 20th century, then the Archangel would have to be pushing 50 by the time of Baroque (2032). Sense Spheres (in both the game and the original stories) don't allow people to see the future, not even for God itself. They only transmit the flow of data throughout the world. Malkuth members can't be promoted in the original stories or in Baroque. This game completely ruins the twist at the end of Interludium in a way that makes me think the author of this game didn't even understand what was happening in those stories. The list goes on.
- Neither Yonemitsu nor Shimizu were personally involved in the original scenarios written for this game. Instead, the author of these scenarios was Masahiro Hikokubo, whose most prominent scripts have been in licensed Yu-Gi-Oh and Naruto games.
- Unfortunately, this is probably the version of the prequel stories that is being referenced by "Baroque International". Bulger's character list entries reference the experiment that created Reika, and I wouldn't be surprised if the repeated references the Baroquemonger/Baroque Salesman (Kitsune) makes to the Horned Woman being connected to him in some way means she's one of the many 'failed' clones of the heroines (Ami, Rie, or Ruby). This seems to be another plot hole, as the staunchly devout Sentry Angel expresses disgust at humanity when shown the Horned Woman's crystal - something he wouldn't do if it were showing him the actions of the Malkuth.